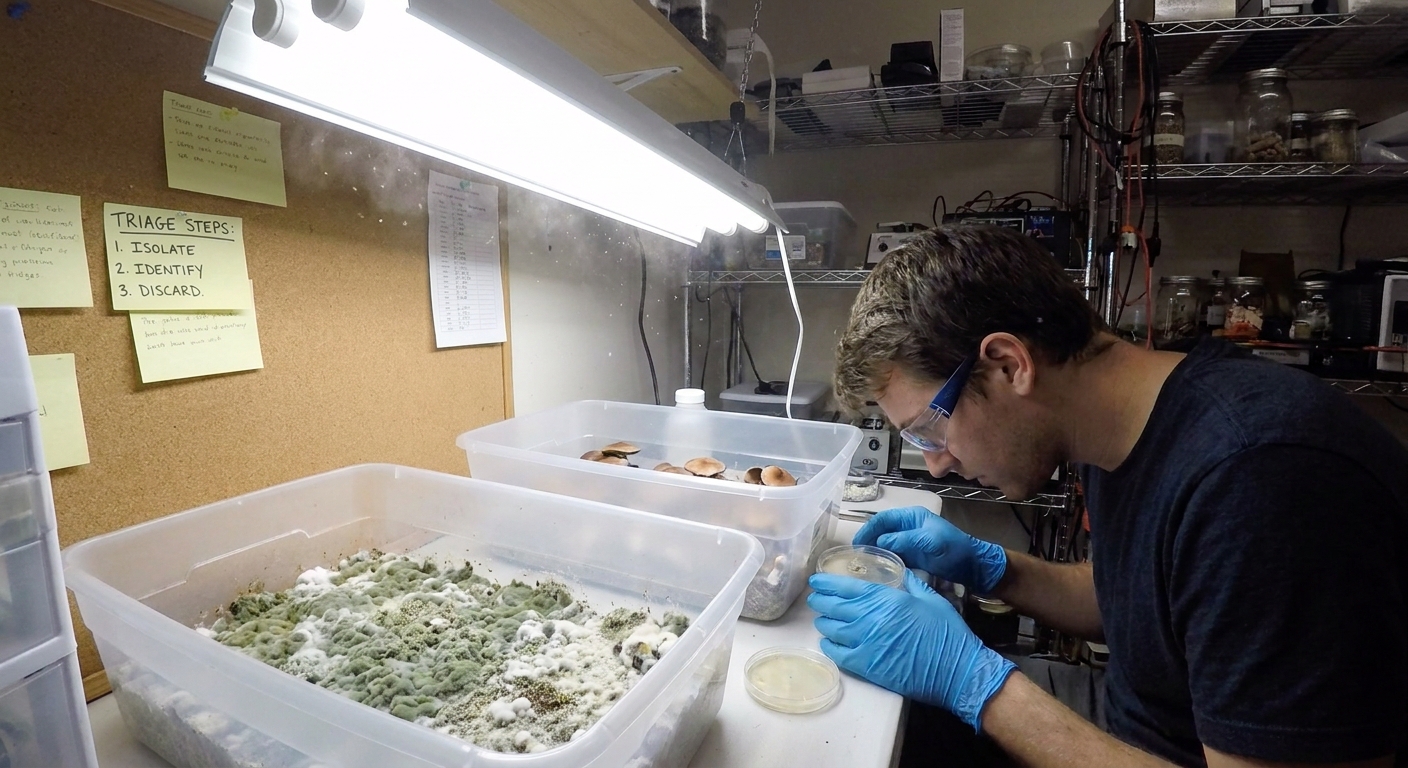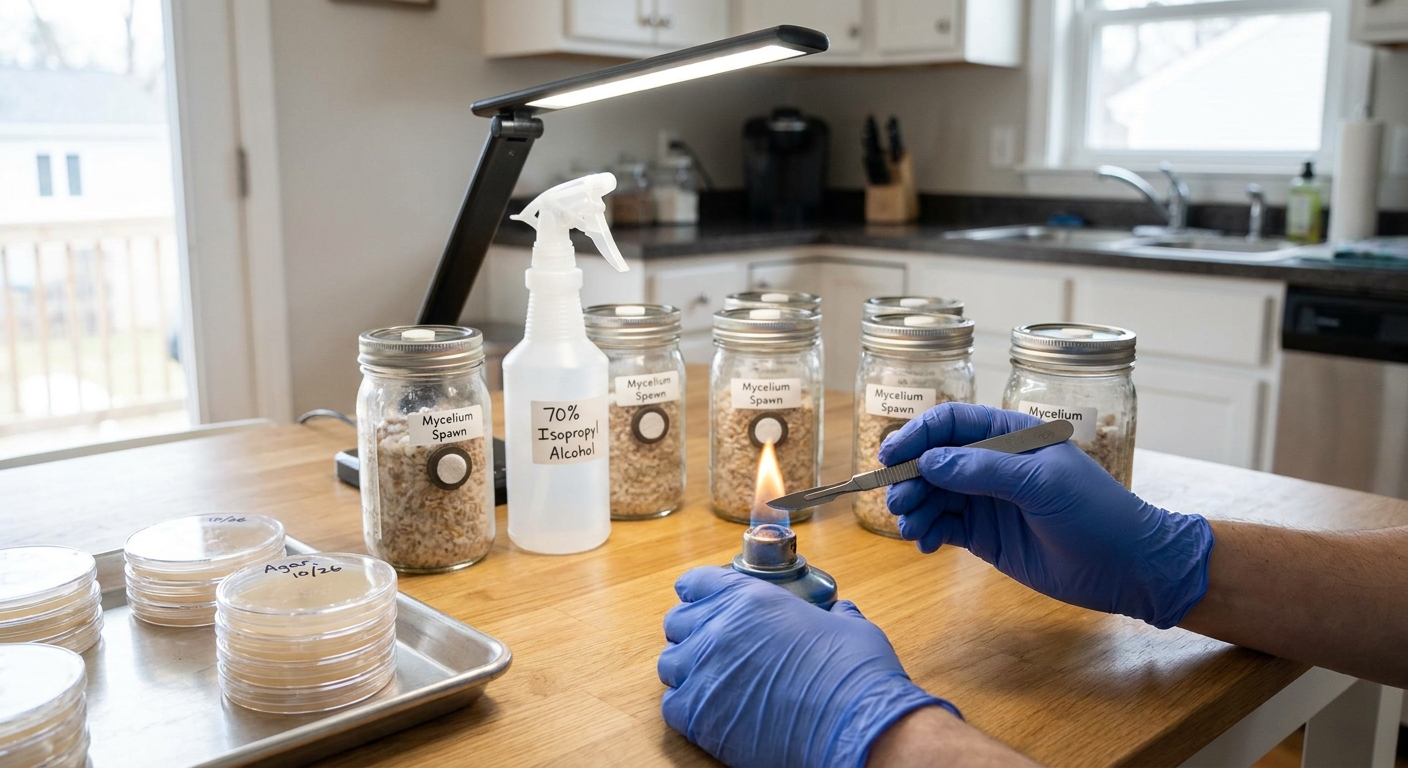
Most new growers obsess over grain prep, substrate mixes, and species choice. The truth: none of that matters if contaminants win the race. Mold, bacteria, and wild yeasts grow faster than your mushroom mycelium and will happily colonize the food you prepared.
Why Contamination Control Matters More Than Your Substrate Recipe
This guide focuses on workflow and decision-making rather than fancy equipment. The goal is not a perfectly sterile lab—it’s a reproducibly clean process that dramatically improves your success rate at home.
Understanding Your Enemies
Before changing your technique, know what you’re fighting.
Common Contaminants
- Trichoderma (green mold)
- Appearance: bright to dark green powdery patches (often starts white and then turns green).
- Smell: sharp, earthy, “dirty” smell.
- Behavior: extremely fast, loves high-nutrient, moist substrates.
- Bacterial contamination (often Bacillus spp.)
- Appearance: wet, slimy grains; kernels that look “boiled” or snotty; yellowish pools.
- Smell: sour, sweet-sour, or “rotten apple / corn” odor.
- Behavior: often localized but can stall mycelium.
- Yeasts
- Appearance: matte, creamy film; sometimes tiny shiny colonies on agar.
- Smell: bready, beer-like.
- Behavior: can cloud LC, slow or weaken grain colonization.
- Other molds (Penicillium, Aspergillus, etc.)
- Appearance: blue, grey, black, or other colors; often fuzzy.
- Behavior: opportunistic, often entering via unclean air or surfaces.
Your job: slow them down and minimize their chances so your chosen mushroom wins.
Core Principle: Broken Down, Not Overwhelming
Think of your process as four stages:
- Culture stage – agar, liquid culture (LC), or spores.
- Spawn stage – grains or other nutrient-rich spawn.
- Bulk stage – pasteurized or sterilized substrate.
- Fruiting stage – fruiting chambers, monotubs, tents, or blocks.
Contamination usually sneaks in at stages 1–2, then becomes obvious at 3–4. You’ll control it best by making small improvements at every stage, not one giant fix.
Stage 1: Clean Cultures at Home
You don’t need a professional lab, but you do need controlled exposure.
Minimal Home Setup
- A still air box (SAB) – clear tote with two arm holes.
- 70% isopropyl alcohol.
- Lighter or alcohol lamp for flaming tools.
- Paper towels, nitrile gloves, and face mask.
SAB Setup Checklist
- Clean table; place SAB on a stable, non-wobbly surface.
- Wipe inside walls, floor, lids of jars, and tools with 70% alcohol.
- Place everything you need inside before you start—no reaching in and out.
- Wait 3–5 minutes for air to settle.
Hands, Movement, and Timing
- Wash hands with soap; wear clean clothes; tie back hair.
- Spray hands/gloves with alcohol and let them dry (wet alcohol carries dust).
- Move slowly inside the SAB; fast movements create air currents.
- Work from cleanest to dirtiest: agar → LC → grain.
Simple Agar-To-Agar Transfer Steps
- Flame sterilize scalpel until red hot; let cool in sterile zone (or touch to unused agar edge).
- Open receiving plate just enough to slip the scalpel in.
- Cut a small wedge (5–10 mm) from clean growth on donor plate.
- Transfer wedge to center of new plate, mycelium side down.
- Close lids quickly but gently; avoid slamming.
Tip: If you see any sectoring or fuzzy vs. rhizomorphic patches, transfer only from the cleanest-looking edge.
Stage 2: Grain Spawn – Where Most Home Growers Lose
General Grain Cleanliness Rules
- Fully hydrated but not bursting grains.
- Kernels separate easily; no standing water at jar/bag bottom.
- Proper sterilization: typically 90–120 minutes at 15 PSI for quart jars.
Species-Specific Spawn Temperatures
- Oyster (Pleurotus spp.): colonize spawn at 22–26°C (72–79°F).
- Lion's Mane (Hericium erinaceus): 20–24°C (68–75°F); too warm invites bacteria.
- Shiitake (Lentinula edodes): 20–24°C (68–75°F); slower-growing, so cleaner spawn is essential.
- Psilocybe cubensis (where legal): 24–27°C (75–81°F); above 28°C sharply increases bacterial risk.
Grain Inoculation Workflow (SAB)
- Shake liquid culture or spore syringe gently; don’t foam it.
- Inside SAB, wipe jar filter and injection port with alcohol.
- Flame needle until red; cool by expelling a drop or two outside the jar or onto sterile gauze.
- Inject into side of jar so you can see growth later.
- Cover hole with sterile tape or use self-healing ports.
If using agar:
- Shake grain jar to loosen grains.
- In SAB, open jar lid slightly and hold at an angle; don’t breathe into it.
- Drop agar wedge onto exposed grains.
- Close lid quickly and firmly; shake lightly to bury agar.
Key habit: Always label jars with date + culture ID + generation (e.g., “LM G2 07/24”). Older generations tend to accumulate hidden contaminants.
Stage 3: Bulk Substrate – Pasteurized vs Sterilized
Pasteurized Substrates (Oyster, Wine Cap, etc.)
Oysters can handle less-than-sterile bulk but need clean spawn and correct ratios.
Common substrates: straw, hardwood fuel pellets, soy hulls, coffee (advanced).
- Oyster straw blocks:
- Pasteurize straw at 60–70°C (140–158°F) for 60–90 minutes.
- Drain until just damp, not dripping.
- Spawn rate: 10–20% by wet weight; higher spawn rates beat contaminants.
Sterilized Substrates (Lion’s Mane, Shiitake, Cubensis)
Hardwood/bran or manure-based substrates often need sterilization.
- Common mix (lion’s mane, shiitake):
- 5 parts hardwood fuel pellets
- 1 part wheat bran
- Water to 60–65% moisture (squeeze test: a few drops, not a stream)
- Sterilize 2–2.5 hours at 15 PSI for large blocks.
Work in your SAB when inoculating sterilized bags—treat them like big grain bags.
Stage 4: Fruiting Without Turning Your Tub into a Mold Farm
Contamination at fruiting is often symptom, not cause—usually it started earlier. Still, you can keep fruiting cleaner.
Fruiting Parameters (General Targets)
- Oyster (P. ostreatus, P. pulmonarius)
- Temp: 16–22°C (60–72°F)
- RH: 85–95%
- FAE: high – oysters need lots of fresh air; CO₂ below ~1000 ppm if possible.
- Lion’s Mane
- Temp: 16–20°C (60–68°F)
- RH: 90–95%
- Moderate FAE; too dry = deformed, hairy fruits.
- Shiitake
- Temp: 13–18°C (55–64°F) for fruiting after colonization/maturation.
- RH: 85–95%
- Needs good FAE to avoid slimy caps.
- Cubensis (where legal)
- Temp: 22–25°C (72–77°F)
- RH: 90–95% early, then 80–90% during harvest.
Practical Fruiting Hygiene
- Mist walls or perlite, not directly on pins when possible.
- Remove obviously moldy blocks or tubs immediately—don’t “see what happens.”
- Between runs, wash tubs with soap, then spray with diluted bleach (1:10) or 70% alcohol.
Honest Troubleshooting: What Went Wrong?
Scenario 1: Green Mold Appears at Bulk Edges
Likely causes:
- Dirty spawn (contaminated grains).
- Too low spawn ratio → mycelium lost the race.
- Overly wet substrate or pooling water at edges.
Fix next time:
- Go back to your spawn source: check agar or LC for hidden contamination.
- Increase spawn rate to at least 15–20% for vulnerable species.
- Improve moisture control; do the squeeze test every time.
Scenario 2: Grains Smell Sour and Won’t Colonize
Likely causes:
- Incomplete sterilization (insufficient time/pressure).
- Overcooked or burst grains; too wet.
- Inoculant (LC/spores) already contaminated with bacteria.
Fix next time:
- Extend PC time: quarts at 15 PSI for full 90–120 minutes after pressure is reached.
- Reduce soak time or simmer; grains should be al dente.
- Test LC on agar before using; if you don’t have agar, inoculate one test jar first.
Scenario 3: Healthy Mycelium, Small or Weak Yields
Likely causes:
- Inadequate FAE → CO₂ too high, fruits abort or stay small.
- Temperature out of range for species.
- Substrate too low in nutrition (especially for lion’s mane and shiitake).
Fix next time:
- Add more holes or adjust vents to increase air exchange; use a small fan indirectly.
- Dial in temp according to species best range.
- For hardwood species, consider 5–10% bran supplementation (but keep sterility tight).
Simple Daily Habits That Cut Contamination in Half
- Dedicate a “lab shirt” only for sterile work; hang it near your SAB.
- Wipe your workspace before and after every session.
- Flame anything that goes from one culture to another. Every. Single. Time.
- Don’t multitask sterile work with cooking, pets, or smoking.
- Take notes: date, conditions, what you changed.
Small, boring habits are more powerful than expensive gear.
When to Cut Losses and Move On
Not every jar or tub is worth saving.
- If more than 25–30% of a jar shows bacteria or mold → toss.
- If a tub has multiple contamination spots early in colonization → bury outside or discard.
- Don’t mix “half-questionable” spawn with good spawn; it just dilutes success.
Walking away from a bad batch frees time and energy for doing the next run better.
Closing: Contamination Control Is a Skill, Not a Purchase
You don’t need HEPA filters or lab coats to grow clean mushrooms at home. Contamination control comes from:
- Understanding how contaminants behave.
- Respecting each stage: culture, spawn, bulk, fruiting.
- Practicing slow, consistent sterile technique.
- Accepting failures as valuable data, not defeat.
Treat your grow space like a small lab, build a repeatable workflow, and your contamination rate will drop while your harvests rise—batch after batch.