If you’ve ever opened a tub to a blast of sour air or watched green islands eat your substrate, you know how demoralizing contamination can be. This article is a triage playbook: how to identify what went wrong, decide what to save, and adjust your technique so each run is cleaner than the last.
Introduction: Stop Guessing, Start Triage
We’ll walk through
- Diagnosing contamination visually and by smell.
- A decision tree: save, isolate, or toss.
- Species-specific risk points.
- Technique upgrades ranked from “free habit” to “gear purchases.”
Use this as a working reference between your SAB and your fruiting setup.
Step 1: Diagnose What You’re Actually Seeing
A. Grain Jars & Bags
Healthy grain spawn:
- Fast, even colonization.
- Mycelium starts as thin, wispy growth and thickens into solid white.
- No strange colors; smell is clean, earthy, sometimes lightly mushroomy.
Common problems:
Wet spot / bacterial grain
- Visual: oily, wet-looking kernels; grains clump or stick. - Texture: mushy kernels if pressed. - Smell: sour, sweet-sour, or “rotten grain.” - Behavior: mycelium avoids these patches or grows weakly around them.
Trichoderma on grain
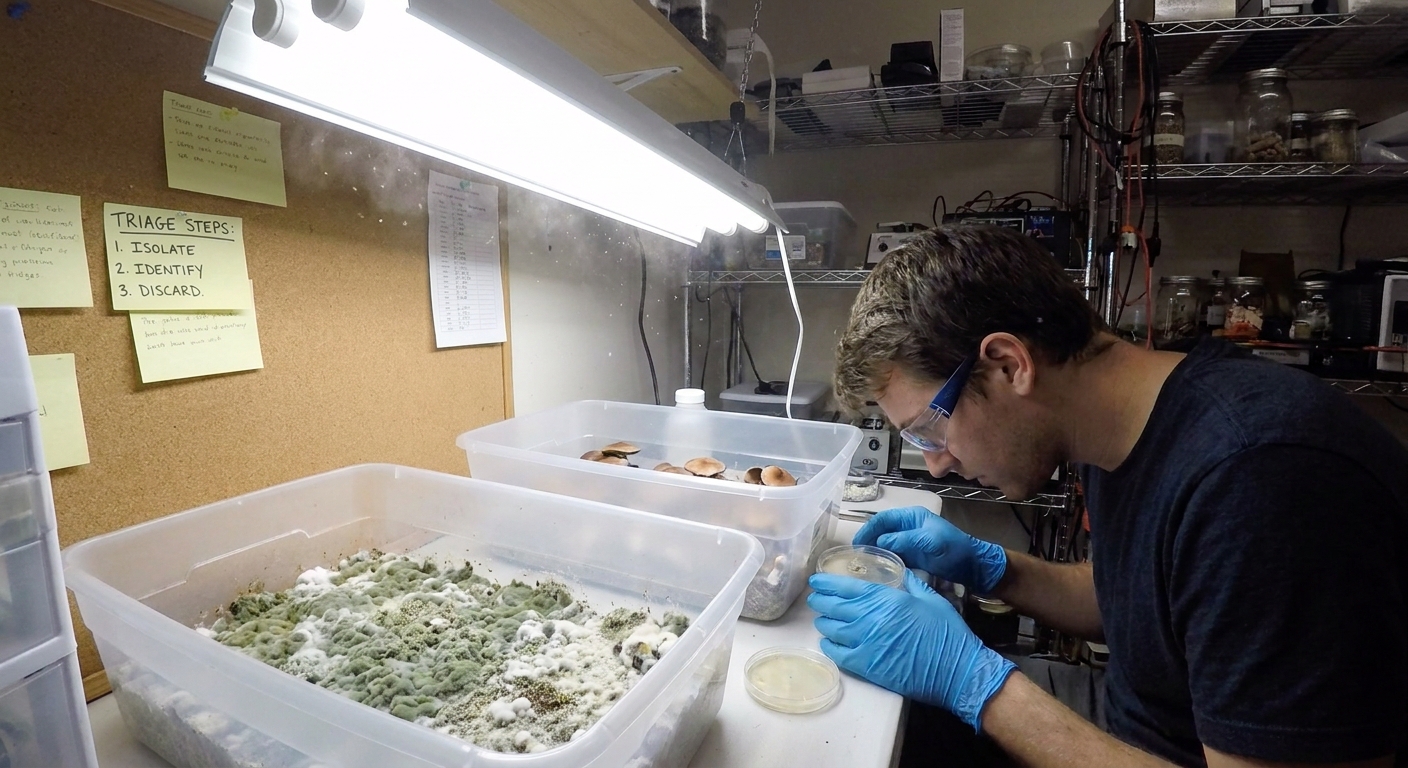
- Visual: cottony white patch that soon turns bright or dark green. - Behavior: spreads aggressively; often appears at filter or uncolonized grain edge.
Yeast in LC or heavily inoculated grain
- Visual (LC): cloudy, with fine particles that don’t settle easily. - Visual (grain): thin, matte film; slow, uneven mycelium.
B. Bulk Substrate & Tubs
Healthy colonizing tub:
- Uniform white spread from spawn points.
- Condensation on walls is normal, but no standing water.
- Smell: fresh mushroom/earthy.
Problem signs:
- Green: trichoderma or other green molds.
- Blue that doesn’t brush off: likely mold, not bruising.
- Grey cobweb texture: possible cobweb mold (looks wispy, not bright white).
- Yellow/brown pools: metabolite “pee” from mycelium fighting something; not always fatal but a warning.
C. Fruiting Blocks (Hardwood + Bran)
- Surface slime or sweet-sour smell → bacterial.
- Only colonized near injection points after weeks → dirty culture or under-sterilization.
You don’t need perfect ID; you just need to answer: bacteria, mold, or unknown? That’s enough for triage.
Step 2: Triage Decision Tree – Save, Isolate, or Toss
Use this simple decision tree for every suspect jar or tub.
1. Does it have any color that isn’t white or light cream?
- Yes → Likely mold.
- >10–15% surface area involved?
- Yes → Toss or outdoor burial.
- No → Isolate; harvest early if pinning, then discard.
- No → Continue.
2. Does it smell sour, sharp, or rotten?
- Yes → Likely bacterial.
- Grain jar: if local, you can test fruiting outdoors, but don’t use as spawn.
- Tub: if heavy odor and stalled growth → toss.
- No / neutral / mushroomy → Continue.
3. Is colonization stalled for >7–10 days with no visible problem?
- Check temperature vs species (see below).
- If temps are correct, assume hidden bacteria or weak culture.
Rule of thumb:
- Spawn: when in doubt, do not use questionable spawn. Contaminated spawn spreads problems.
- Fruiting: small surface issues can be isolated and limped to a harvest, but don’t clone or save genetics from stressed, contaminated runs.
Step 3: Species-Specific Weak Points
Different species lose to contaminants in different ways.
Oyster Mushrooms (Pleurotus spp.)
- Strengths: Very fast colonizers; can outcompete moderate background contamination in pasteurized substrates.
- Weak points:
- Too wet straw or coffee grounds = bacterial mess.
- Low spawn rates (<10%) make contamination more likely.
Target parameters:
- Spawn colonization: 22–26°C (72–79°F).
- Fruiting: 16–22°C (60–72°F), high FAE, RH 85–95%.
Practical adjustments:
- Use hot water pasteurization for straw: 60–70°C for 60–90 minutes.
- Spawn heavy: 15–20% by wet weight, especially if your environment isn’t very clean.
Lion’s Mane (Hericium erinaceus)
- Strengths: Loves hardwood supplemented blocks; good yields from clean spawn.
- Weak points: Slow starter; bacteria will outpace it in overly rich, dirty substrates.
Target parameters:
- Spawn run: 20–24°C (68–75°F).
- Fruiting: 16–20°C (60–68°F), RH 90–95%, moderate FAE.
Practical adjustments:
- Keep bran supplementation to 5–10%; higher levels need excellent sterilization (2–2.5 h at 15 PSI).
- Avoid reusing suspect LCs; test every LC on one sacrificial jar before committing.
Shiitake (Lentinula edodes)
- Strengths: Stable when fully colonized and matured; blocks are resilient.
- Weak points: Very slow; contamination at spawn or early block colonization is fatal.
Target parameters:
- Spawn run: 20–24°C (68–75°F).
- Block colonization + browning phase: similar temps, often 60–90 days.
- Fruiting: 13–18°C (55–64°F), RH 85–95%.
Practical adjustments:
- Be extra picky with spawn; shiitake does not recover well from dirty spawn.
- Let blocks fully brown; early fruiting attempts often end in bacterial or mold outbreak.
Psilocybe cubensis (where legal)
- Strengths: Very forgiving species; does fine on pasteurized bulk when spawn is clean.
- Weak points: Warm temps that favor bacteria; overhydrated grain and bulk.
Target parameters:
- Spawn run: 24–27°C (75–81°F), but closer to 24–25°C is safer.
- Fruiting: 22–25°C (72–77°F), RH 90–95%.
Practical adjustments:
- Keep grain jars on the drier side of field capacity.
- If using coir/verm bulk: hydrate to just a few drops on squeeze, not a stream.
Step 4: Technique Upgrades – Start with Habits, Not Hardware
You don’t need a flow hood to fix most contamination. Implement these in order.
Tier 1: Free Habit Changes
Decontaminate work surfaces properly
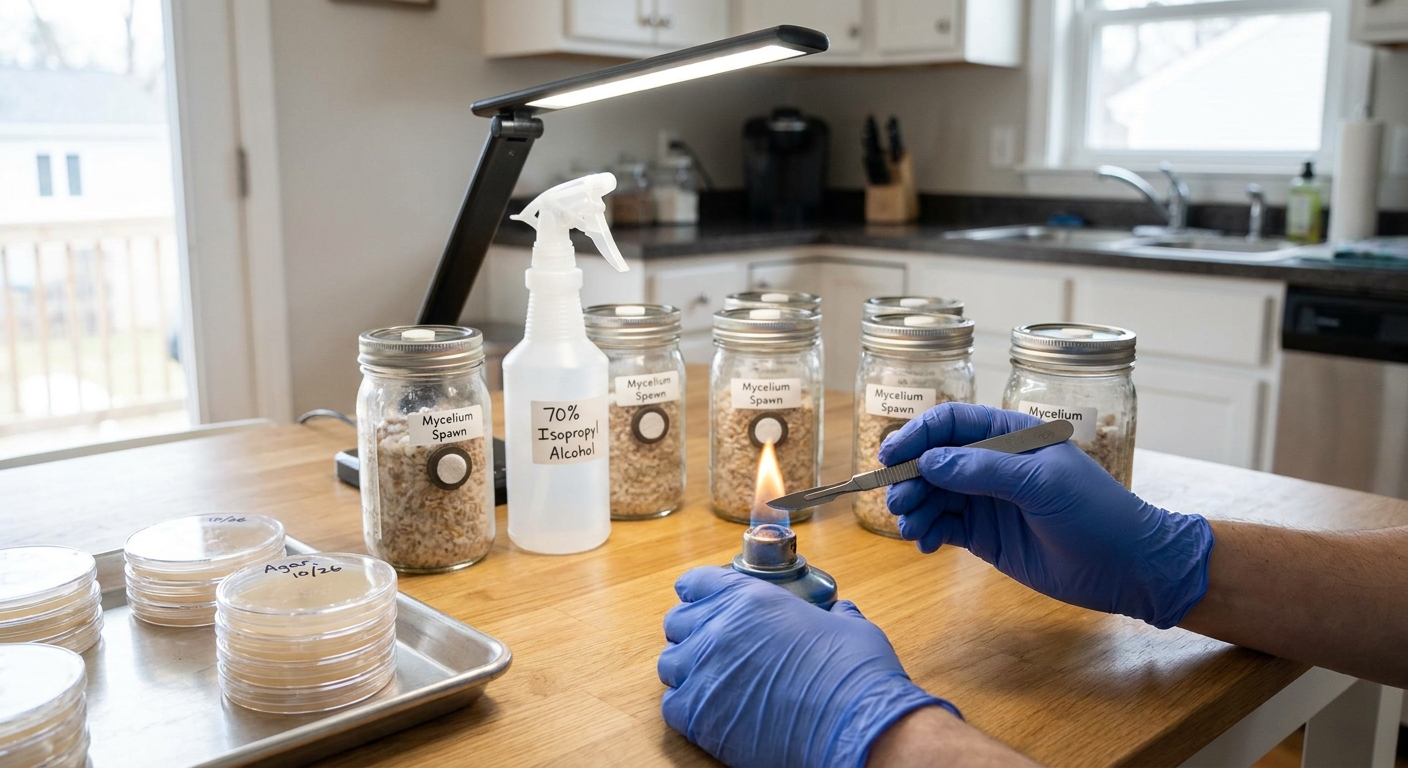
- Wipe with soapy water first, then 70% isopropyl. Soap removes films; alcohol kills.
Reduce traffic during sterile work
- Close windows, turn off fans, keep pets and people out. - Let the room air settle 10–15 minutes before you open plates or jars.
Slow, deliberate movements
- In a SAB, rushing causes turbulence. Treat it like underwater work.
Mask and hair control
- Your breath and hair are constant particle sources. Mask + tied-back hair significantly helps.
Tier 2: Cheap but High-Impact Additions
Proper Still Air Box (SAB)
- Clear tote, arm holes cut smooth, big enough to work but not enormous. - Elevate it slightly so arm holes don’t pinch your sleeves and cause drafts.
Dedicated alcohol spray & paper towels
- One bottle lives next to the SAB; don’t use random household cleaners mid-session.
Metal tools + flame source
- Scalpel or inoculation loop; refillable butane torch or alcohol lamp. - Flame until red; cool in sterile zone, not on the desk.
Tier 3: Equipment Once You Max Out Habits
Pressure cooker with reliable gauge
- Invest in one that clearly hits 15 PSI. Under-pressure means under-sterilization.
Filtered lids and injection ports
- For grain and LC, use synthetic filter discs or micropore-covered holes + self-healing ports.
Flow hood (optional, advanced)
- Only really worth it once you’re comfortable with SAB work and running multiple projects.
Step 5: Troubleshooting by Stage – Where the Problem Likely Started
Problem Shows at Grain Stage
Most likely sources:
- Dirty inoculant (LC, spore solution, agar).
- Under-sterilized grain (time/pressure).
- Poor moisture control.
Next-run adjustments:
- Test LC on agar or a single “test jar.”
- Extend PC time to 90–120 minutes at 15 PSI for quarts.
- Modify soak/simmer; grains should be plump but not bursting.
Problem Shows at Bulk Colonization
Most likely sources:
- Mild contamination in spawn that exploded with more nutrients.
- Pasteurization not hot/long enough.
- Too wet bulk substrate; poor gas exchange.
Next-run adjustments:
- Only use spawn that smells clean and looks vigorous.
- For pasteurization: verify temp with a thermometer; 60–70°C for 60–90 minutes.
- Drill small, filtered gas exchange holes if bags look vacuum-sealed.
Problem Shows Only at Fruiting
Most likely sources:
- Environmental contamination from dirty chamber or room.
- Over-misting + stagnant air → microclimates for mold.
Next-run adjustments:
- Between grows, scrub chambers with soap; follow with 1:10 bleach or 70% alcohol wipe.
- Increase FAE: more holes, adjusted lid, or gentle indirect fan.
- Mist less but maintain high RH via humid substrate or humidifiers.
Quick Reference: When to Push Through vs. Start Over
Okay to push through:
- Minor yellow metabolites with otherwise vigorous mycelium.
- Slight bacterial wet spot in 1 of 5 jars used for a personal experiment, not main spawn.
- Small mold spot appearing late in fruiting – isolate, harvest early, then discard.
Time to start over:
- Multiple jars from the same LC all smell off → your LC or agar is dirty.
- Trich covering >15–20% of a colonizing tub.
- Jars not showing visible growth after 10–14 days at correct temperature.
Every time you decide to start over, write down:
- Date.
- Suspected cause.
- One specific thing you will change.
Those notes are your personal contamination textbook.
Turning Frustration into Data
Contamination will never be zero, even in professional labs. The realistic goal for a home grower is:
- Most jars colonize fully and quickly.
- Occasional contaminated tub, but you can point to the likely reason.
- Each new run feels a bit more controlled.
By treating each issue as a data point—tracing it back with the triage steps above—you’ll steadily decrease contamination and increase yields, without needing to turn your house into a clean room.
Work clean, move slowly, take notes, and let your mycelium do the rest.