Most home mushroom labs don’t fail for lack of passion. They fail because the space and gear were never designed to control three things: airflow, moisture, and cleanliness.
Introduction
This guide walks through how to design a reliable, compact grow lab at home—from a spare closet to a dedicated room—using realistic, affordable gear. We’ll cover sterile technique, species-specific parameters, and what to do when contamination shows up anyway.
Step 1: Choose Your Space (and Be Honest About It)
Your first decision isn’t which monotub or which sterilizer—it’s where you’ll work.
Minimum requirements
- Low traffic: No hallway corners, no busy kitchens.
- Easy-to-clean surfaces: Smooth walls, sealed floors are ideal; avoid carpets if possible.
- Close to water and power: For cleaning, pressure cookers, flow hood, etc.
- Control over airflow: You want predictable air, not “fresh” air.
Space options
Small closet / cabinet lab
- Good for: Agar work, culture maintenance, making grain spawn. - Limitations: Restricted space; fruiting usually done elsewhere.
Half-room micro lab
- Good for: Small-to-medium production; both sterile work and fruiting. - Approach: Dedicate one corner to sterile work, another to fruiting, and a clean staging area in between.
Garage / basement lab
- Good for: Higher volume grows. - Watch for: Temperature swings, humidity extremes, dust, and insects.
Lab-minded rule: Start smaller than you think and design for repeatable cleanliness, not maximum yield on day one.
Step 2: Core Sterile-Work Gear
Sterile work is where you either build a clean culture pipeline or chase contamination forever.
1. Still Air Box (SAB)
The SAB is a clear tote with arm holes, but it’s more than that: it’s your first controlled airspace.
Specs & setup
- Size: 66–100 L clear tote with flat sides.
- Arm holes: 10–12 cm diameter, cut smooth; no gloves permanently attached.
- Height: Place on a stable table or counter at comfortable working height.
- Let the SAB sit for 10–15 minutes after you move it so air settles.
- Work slow and deliberate; fast movements create turbulence.
- Spray the inside lightly with soapy water or 70% isopropyl (avoid soaking filters or cardboard).
Use principles
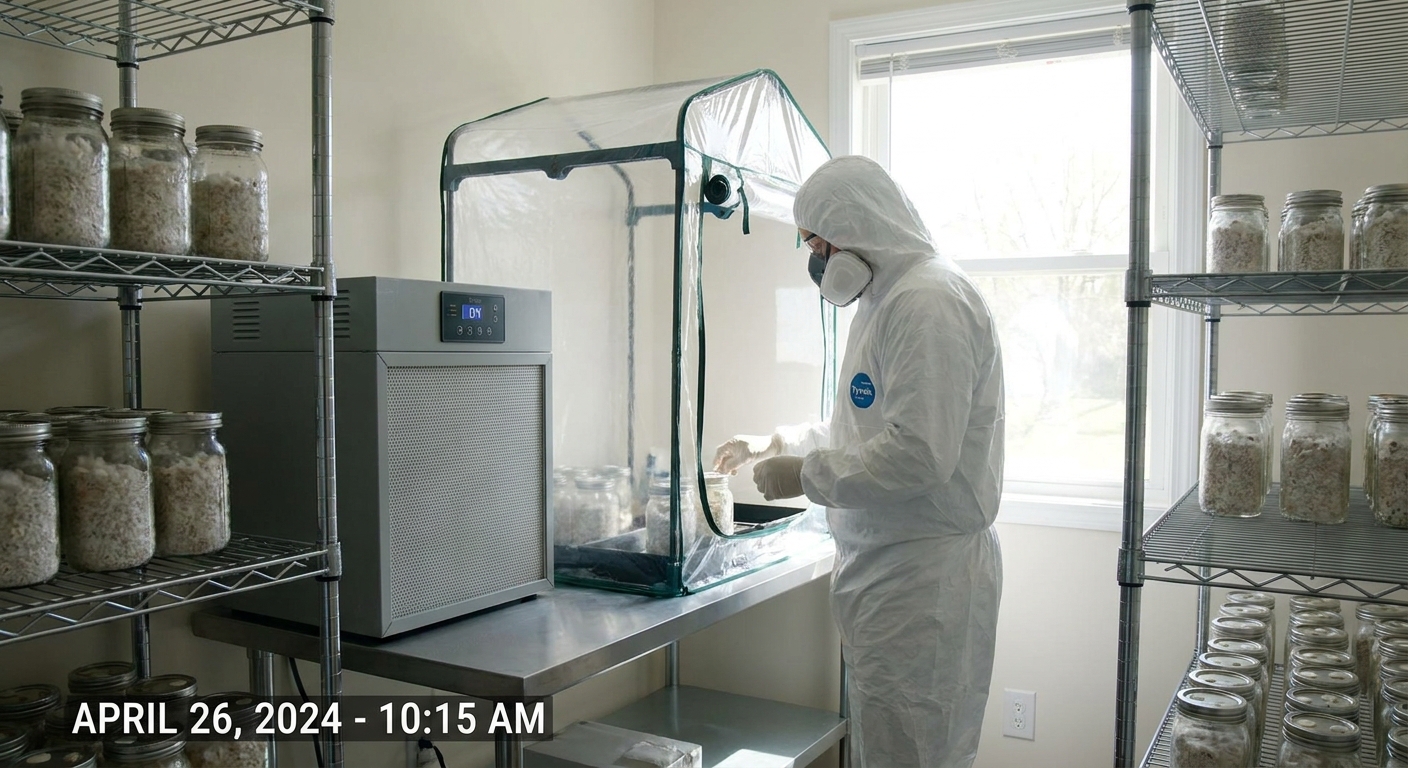
2. Laminar Flow Hood (Upgrade Path)
If you’re serious about agar and grain, a quality flow hood is transformative.
Core components
- HEPA filter: 99.97% @ 0.3 µm; common sizes: 24x12" or 24x24".
- Blower: Matched to filter specs (target 100–120 ft/min at face).
- Pre-filter: Extends HEPA life, reduces dust.
- Filter at face height, on a stable bench.
- Nothing behind the hood that kicks up dust (fans, open windows).
- Work 6–12 inches from the filter face.
- Never put hands or objects directly in front of the mouth of a culture, plate, or grain jar.
- Flame-sterilize tools to the side, then move into the stream.
Positioning
Flow hood discipline
3. Essential Sterile Tools
- Pressure cooker / autoclave: 15 PSI minimum.
- Grain: 90–120 min @ 15 PSI.
- Agar: 25–30 min @ 15 PSI.
- Alcohol lamp or butane torch: For flaming scalpels and needles.
- Scalpels + blades: #10 or #11 blades; keep a stock of sterile replacements.
- 70% isopropyl alcohol + paper towels: For wiping surfaces and gloves.
- Parafilm or micro-pore tape: For sealing agar plates.
Step 3: Fruiting Gear by Species
Different fungi want different microclimates. Matching your gear to the species saves a lot of “mystery failures.”
A. Cubensis & Other Tropical Species
Examples: Psilocybe cubensis, Panaeolus cyanescens (advanced), some tropical oysters.
Target parameters
- Temp: 22–26°C (72–79°F).
- RH: 90–95% during pinning; 85–92% during fruiting.
- FAE (fresh air exchange): Moderate.
Gear options
Monotubs
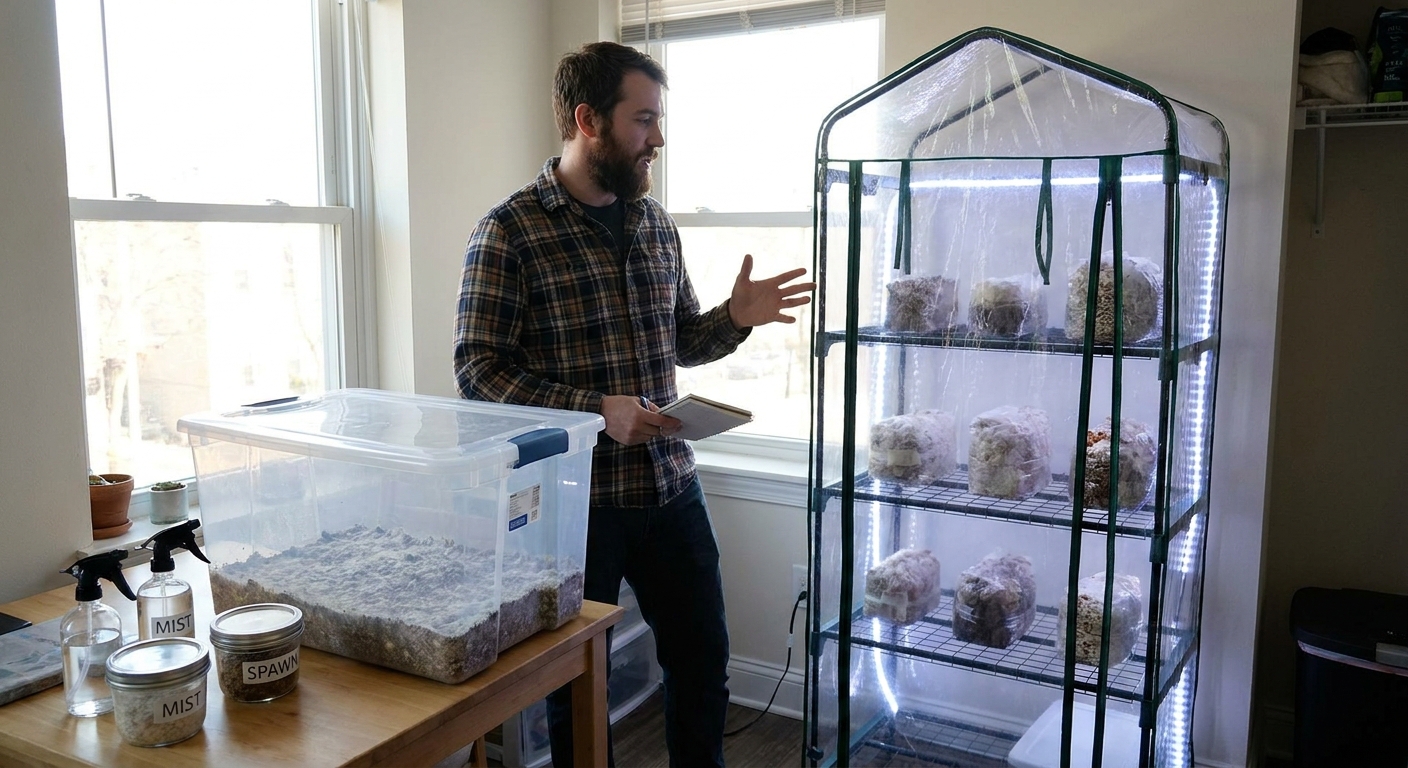
- Opaque tote (50–70 L) with side holes for FAE. - Polyfill or micropore tape in holes. - Liner bag to reduce side pins and ease cleanup.
Monotub workflows
- Spawn: 1 part fully colonized grain.
- Substrate: 2–3 parts pasteurized coco coir + vermiculite.
- Depth: 7–10 cm (3–4").
- Incubation: Tub sealed or filtered, no light needed.
- Fruiting: Introduce light & increased FAE when surface is fully colonized and slightly glistening.
Martha tent (greenhouse)
- Best for multiple trays or shoeboxes. - Requires: - Shelving unit with zip cover. - Ultrasonic humidifier + tubing. - Small fan for air movement (on timer).
B. Oysters, Lions Mane, Cold-Loving Species
Examples: Pleurotus ostreatus, P. pulmonarius, Hericium erinaceus, Shiitake.
Target parameters (often cooler)
- Oysters: 15–24°C (59–75°F), RH 90–95%, high FAE.
- Lion’s mane: 16–22°C (60–72°F), RH 90–95%, gentle airflow.
- Shiitake: 12–20°C (54–68°F) after cold shock, RH 85–95%.
- Higher FAE capacity: oysters especially need lots of fresh air to avoid long stems and tiny caps.
- Stronger humidity control: small fruits dry out quickly.
- Bag fruiting racks: wire shelving + hooks or supports.
- Humidifier on an inkbird-style humidistat, set to RH range.
- Inline fan or small PC fan at top for continuous gentle air exchange.
- Drip tray at bottom + tongue-and-groove mat or plastic to protect floors.
Gear focus
A Martha-style tent with:
Step 4: Environmental Control Gear
Humidity Management
- Ultrasonic humidifier: Produces cool mist; pair with a humidistat.
- Timer vs controller:
- Timer: Cheap, but requires manual dialing-in.
- Humidity controller: More precise; set high/low thresholds.
Practical tip: Place the humidifier outside the tent and pipe mist in. This avoids soaking electrical gear and prevents puddling.
Temperature Control
- Seedling heat mat (with thermostat): For cold apartments.
- Oil-filled radiator: Safer, more even heat than space heaters.
- AC or evaporative cooler: For hot regions; keep air indirect.
Always measure at substrate level, not near the ceiling.
Air Movement & Filtration
- HEPA room purifier: Reduces background spore and dust load.
- Small circulation fans: Point away from fruiting blocks; you want movement, not wind.
Step 5: Sterile-Work Technique in Practice
A good setup fails without good habits. A quick, realistic workflow:
Pre-work checklist
- Shower or wash hands/forearms.
- Clean clothing; avoid pet hair, fleece, dusty shirts.
- Mask and hair cover if you have long hair.
- Wipe surfaces with 70% iso.
- Turn on flow hood (if using) for 15–30 minutes beforehand.
Agar transfer sequence
- Flame-sterilize scalpel until red-hot.
- Cool blade by touching an unused agar edge (or wait a few seconds in sterile air).
- Open plate lids minimally and briefly.
- Cut small wedges; avoid talking or breathing directly over plates.
- Seal plates with parafilm.
Grain-to-grain (G2G) transfers
- Only perform in a SAB or flow hood.
- Work with cooled, fully colonized donor jars.
- Minimize shaking or banging to reduce dust.
- Tilt receiving jar so grains fall in without touching the rim.
Step 6: Honest Troubleshooting by Symptom
Problem: Trichoderma (green mold) in bulk tubs
Likely causes
- Weak or contaminated spawn.
- Too wet substrate.
- Poor gas exchange during colonization.
- Upgrade PC times on grain.
- Improve SAB/flow hood technique.
- Add more micropore tape layers on monotub holes during colonization.
- Use a reliable thermometer/hygrometer to avoid over-misting.
Gear-related fixes
Problem: Bacterial grain (wet, sour smell, slimy kernels)
Common causes
- Inadequate sterilization time.
- Overly wet grain.
- Dirty inoculation (spore syringe to grain in open air, etc.).
- PC at 15 PSI, 2 hours for full quart jars of grain.
- Use simmer + steam-dry method for grain so surfaces are dry before loading.
- Switch to agar > grain pipeline.
Gear & process fixes
Problem: Poor yields on oysters (long stems, tiny caps)
Indicators
- High CO₂, low FAE.
- Increase exhaust / fan runtime in tent.
- Cut larger or more X-shaped holes in bags.
- Reduce total number of bags per tent (less respiratory load).
Fixes
Problem: Surface cracking / dry pins on cubes
Likely causes
- Inconsistent humidity or direct fan air.
- Adjust misting schedule to maintain tiny surface droplets.
- Fan manually or reduce FAE holes slightly if surface dries in under a few hours.
Fixes
Step 7: Build in Data and Iteration
A lab mindset means you don’t just guess—you record and adjust.
Minimum logging
For each grow, note:
- Strain/species.
- Substrate recipe and depth.
- Temperatures (room and substrate level).
- RH (estimated or from hygrometer).
- Fruiting start date, first harvest date.
- Contamination type and timing.
Then only change one variable at a time—more FAE, slightly different spawn ratio, etc.
Conclusion
You don’t need a perfect lab to grow excellent mushrooms at home. You need predictable airflow, adequate sterilization, and species-appropriate environmental control.
Start with a still air box, a pressure cooker, and a disciplined routine. Add a flow hood and fruiting tent when your practice justifies the upgrade. With a lab-minded approach, each run becomes data—not just a gamble—and both your yields and your confidence will steadily climb.