Fruiting is where sterile technique meets environmental management. Up to colonization, you’ve focused on keeping microbes out. Once you enter fruiting, you’re still protecting against contamination, but you’re also sculpting temperature, humidity, gas exchange, and light to tell the mycelium: “It’s time to make mushrooms.”
Overview
This guide walks through a practical, step-by-step path from fully colonized substrate to repeated harvests, with parameters and troubleshooting tailored to common species like Psilocybe cubensis, Pleurotus (oysters), and Lentinula edodes (shiitake).
Step 1: Confirm Full Colonization
Before exposing to fruiting conditions, ensure your substrate is fully colonized.
Visual and Tactile Checks
- Color
- Cubensis & oysters: bright white, even coverage.
- Shiitake blocks: dense white mycelium that often begins to brown (skin formation) before fruiting.
- No visible uncolonized patches (e.g., brown coir, whole grains) larger than a few mm.
- Firm to the touch: the substrate should feel like a single, unified “cake” or block rather than loose material.
Hold Time After Colonization
Allow consolidation (mycelium digests the substrate internally):
- Ps. cubensis: 5–7 days after surface is fully white.
- Oysters: 3–5 days is often enough.
- Shiitake: 1–3 weeks; the block may brown (“ripe”) before it’s ready.
Skipping consolidation is a common cause of weak pinsets and bacterial problems later.
Step 2: Prepare Your Fruiting Space
Even though fruiting is not aseptic in the strict sense, clean conditions dramatically reduce contaminant pressure.
Minimum Environmental Control
A reliable home fruiting setup can be as simple as:
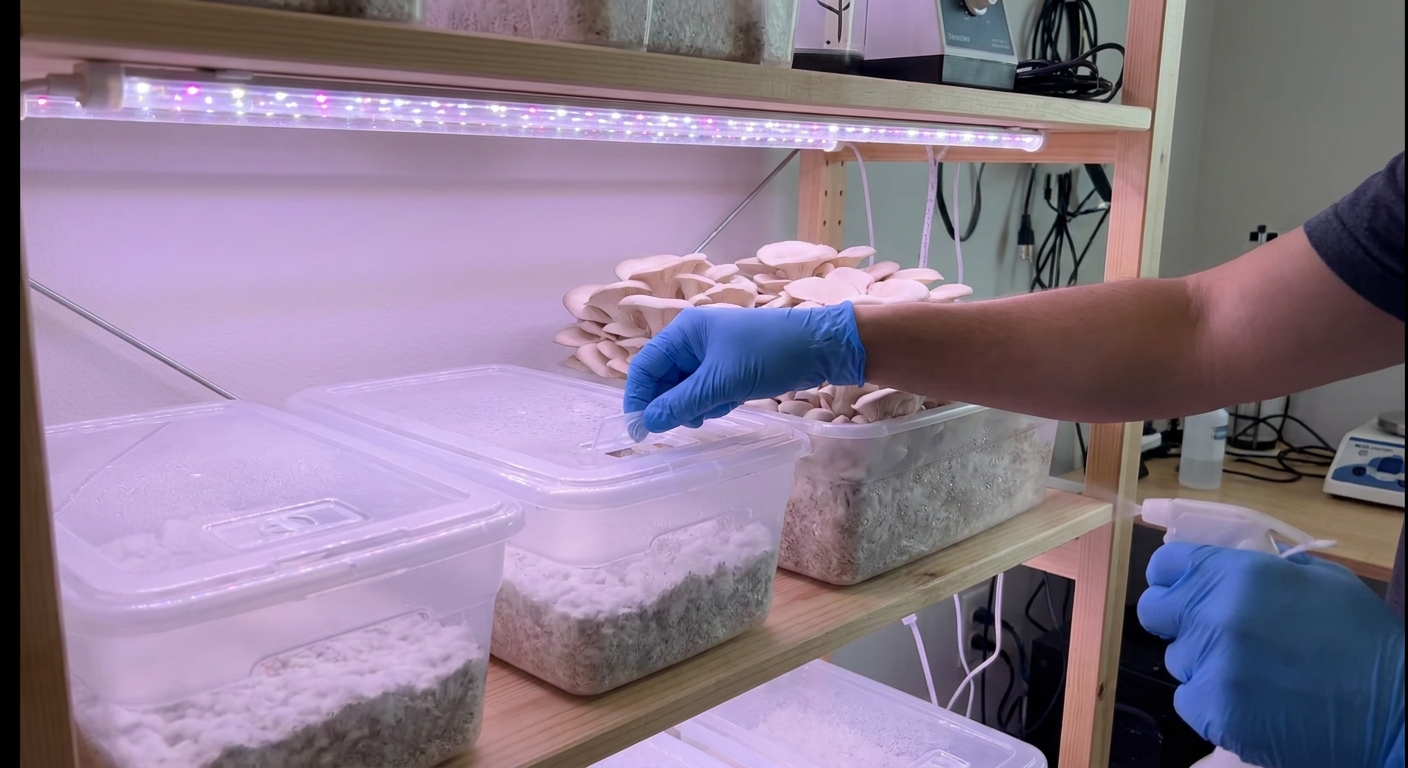
- Monotub with adjustable holes and polyfill or micropore tape.
- Martha tent / greenhouse with humidifier and small fan.
- Shotgun-style tote for low-tech grows (not ideal for high yield but works for learning).
Regardless of hardware, aim for:
- Fresh Air Exchange (FAE): enough to prevent CO₂ buildup but not so much that surfaces dry out.
- High Relative Humidity (RH) around substrates.
- Cool, stable temperatures within species range.
Cleaning Protocol
- Remove old substrate, spent blocks, and visible moldy items from the area.
- Wipe down hard surfaces (shelves, walls of tent, lids) with 70% isopropyl alcohol or dilute bleach (1:10).
- If possible, run a HEPA filter in the room for 30–60 minutes before opening containers.
- Wear a clean mask and tie back hair to reduce spore load.
You can’t create a perfect cleanroom, but reducing background spores helps your culture win the race.
Step 3: Introduce Fruiting Conditions
Each species interprets cues differently, but the main variables are:
- Light
- Fresh air (CO₂ levels)
- Humidity
- Temperature
- Mechanical/soak shock (for some species)
Psilocybe cubensis (Monotub or Tent)
Target parameters:
- Temp: 22–25°C (72–77°F)
- RH: 95–100% at surface; 85–95% ambient in tent
- Light: 12/12 cycle, 6500K LED or indirect daylight
- FAE: moderate; side holes lightly packed with polyfill or covered with 1–2 layers micropore tape
Steps:
- Verify full colonization and 5–7 day consolidation.
- Surface conditioning: if needed, lightly mist lid or walls; substrate surface should glisten with tiny beads, not standing puddles.
- Open tub and flip or slightly offset the lid for more FAE, or adjust polyfill density.
- Set up a 12/12 light cycle. Light triggers photomorphogenesis (correct orientation and pigmentation).
- Check surface 1–2x daily. Adjust misting and FAE (see troubleshooting below).
Oyster Mushrooms (Pleurotus spp.)
Oysters are more forgiving of contamination but demanding about air.
General targets (Pearl/Blue oysters):
- Temp: 15–21°C (59–70°F) for best texture
- RH: 90–95%
- Light: 12/12, bright diffuse
- FAE: high – they are CO₂-sensitive
Steps:
- Colonize bags fully, then allow 3–5 days consolidation.
- Cut X-shaped slits or remove pre-made filter patches to expose the block.
- Place in a tent or humidity-controlled space with constant gentle air movement (small fan outside tent, not blowing directly on blocks).
- Maintain visible condensation on tent walls but keep the block surface just moist, not soaking.
Shiitake (Lentinula edodes)
Shiitake require a ripening and shock phase.
Targets (typical warm-weather strain):
- Incubation temp: 20–24°C (68–75°F)
- Fruiting temp: 12–20°C (54–68°F)
- RH: 85–95%
- Light: moderate
Steps:
- Let blocks brown and harden for 1–3 weeks after colonization.
- Cold shock: Soak the block in cold, clean water (3–10°C / 37–50°F) for 4–8 hours, then drain well.
- Place upright in a cooler fruiting environment with good humidity and intermittent FAE.
- Avoid constant surface wetness; shiitake appreciate high RH air, not misting directly on forming caps.
Step 4: Managing Humidity and FAE Like a Lab Tech
Think of your fruiting chamber as an environmental incubator.
Humidity Control
- Use ultrasonic or cool-mist humidifiers on a timer or humidity controller.
- In monotubs, rely on evaporation from substrate and closed volume to stay humid.
Visual cues:
- Ideal: tiny beads of moisture on substrate, no pooling; caps matte to slightly moist.
- Too dry: substrate surface looks dull, shrinks from walls; pins abort or caps crack.
- Too wet: pooling water, matted mycelium, bacterial smell.
Fresh Air vs. Drying
Increasing FAE usually reduces RH and speeds evaporation. Balance them:
- If stems are long and skinny, with small caps, increase FAE (more holes, looser polyfill, more fan runtime).
- If caps crack or edges dry, add humidity or slightly reduce FAE.
Step 5: Pinning to Harvest
Pin Formation
Pins (primordia) usually appear:
- Cubensis: 5–14 days after introducing fruiting conditions.
- Oysters: 3–7 days.
- Shiitake: 7–14 days post-soak.
Monitor:
- Keep surface conditions stable during this period. Avoid strong misting directly on pins; mist the walls or gently above the canopy.
- If only edges pin, the center might be too wet or CO₂ is trapped.
When to Harvest
Ps. cubensis:
- Ideal: just as the veil under the cap begins to tear.
- Earlier harvest = smaller fruits but slightly denser; later = more spore release and potentially messy tubs.
Oysters:
- Harvest when caps are broad and edges are still slightly in-rolled.
- If edges are flat or turning up, you’re late; texture becomes tough and spores abundant.
Shiitake:
- Pick when caps are 70–80% open, edges slightly rolled down.
- Overmature caps flatten and drop spores heavily.
Harvest Technique
- Clean hands or gloves wiped with 70% alcohol.
- For clusters, grasp the base and gently twist while lifting to remove as a single mass.
- Use a clean knife or scalpel to trim stubs at the substrate surface to reduce rot.
- Do not leave decaying stumps; they invite bacteria and green mold.
Step 6: Between Flushes
Most substrates can yield multiple flushes.
Rest and Rehydrate
- Remove all aborts and stumps.
- For monotubs, often no full soak is needed after first flush; a heavy misting or short 1–2 hour dunk can suffice if the block looks dry and light.
- For bags/blocks (oysters, shiitake):
- Soak in clean, cold water for 2–4 hours.
- Drain thoroughly before returning to fruiting space.
Expect Diminishing Returns
- Cubensis: 2–3 good flushes are typical; after that, contamination risk rises.
- Oysters: 2–4 flushes, depending on sawdust vs. straw and supplement level.
- Shiitake: 3–6 flushes spaced weeks apart for well-managed blocks.
Contamination & Yield Troubleshooting
Common Contaminants in Fruiting
- Trichoderma (green mold): bright white, then vivid green powdery spores.
- Action: cut out and remove small spots immediately; if widespread, remove the entire tub/block from your grow area.
- Bacterial blotch / wet spots: slimy, discolored patches; sour smell.
- Action: increase FAE, reduce direct misting, discard heavily affected blocks.
- Black molds: dark spots or fuzz; often environmental.
- Action: remove affected substrate; clean chamber thoroughly.
Low or Uneven Yield
Symptom: Few pins, mostly at edges
- Likely surface conditions are off (center too wet, edges ideal).
- Loosen lid/FAE slightly and reduce misting to the center.
- Ensure adequate light coverage.
Symptom: Tall, skinny mushrooms with small caps
- CO₂ too high: insufficient FAE.
- Increase air exchange: adjust polyfill, open vents, add gentle fan.
Symptom: Caps cracking, dry surface
- Humidity too low or evaporation too aggressive.
- Increase RH, reduce direct airflow, check humidifier output.
Symptom: Many aborts (tiny dark pins that stop growing)
- Often due to unstable surface moisture or stress (temp swings, bacterial pockets).
- Harvest aborts during flush cleanup; they are not necessarily unsafe if grown clean, but don’t let them rot in the tub.
Practical Sterile-Work Mindset During Fruiting
- Do all substrate transfers, bag openings, and major interventions away from visibly moldy items.
- Handle colonized blocks with clean gloves and tools.
- Don’t re-use heavily contaminated fruiting chambers without a proper wipe-down and dry-out period.
- Segregate suspect tubs/blocks: one moldy monotub can seed a whole room.
Apply the same discipline you use in your still-air box or flow hood: deliberate movements, clean surfaces, and minimal unnecessary handling.
Final Notes
Consistent fruiting is less about secret recipes and more about watching how your mycelium responds and adjusting parameters like a technician. Treat each grow as data: log temps, RH, flush weights, and observed issues. Over time, your “lab” becomes a tuned environment where colonized substrate reliably turns into dense canopies.